 DreamHost hosting company offers the best hosting plans and services. With 20 years of hosting experience, the best hosting provider in India offers customized plans for your website as well.
It integrates with other open-sourced platforms to make your website more scalable. It offers special VPS and website hosting for small and big business organizations along with DreamHost coupon.
DreamHost offers a commitment to security that prevents your site from threats and hacking attacks. With 24/7 dedicated technical support, you won’t have any issues related to your site. DreamHost is the most trusted site for WordPress integration. It also offers manual and one-click integration for your WordPress website.
How to Install WordPress on DreamHost?
Another top hosting provider that offers premium WordPress hosting, DreamHost is an excellent choice to host your WordPress website. It offers abundant features and control panel support with all hosting packages. Plus, for WordPress users, it offers 1-click WordPress installation through the customized DreamHost control panel. As such, if you want to know how to install WordPress on DreamHost, then check out this guide that includes both – the 1-click WordPress installation process and the manual WordPress installation process.
A. Why DreamHost is an Ideal Platform for WordPress Hosting?
DreamHost is recommended by WordPress as the number one hosting for WordPress sites. It offers in-house WordPress expert supervision with added technical support.
With WordPress optimized servers, you can use the best features for your hosting. It offers basic WordPress hosting along with VPS WordPress hosting. It provides automatic WordPress updates with free SSL certificates.
It offers free domain support with easy to use custom-built panel. Email hosting and automated backups are a part of WordPress hosting plans.
With different storage features, you’ll also be able to expand your WordPress site capacity in the future. It offers up to 100% uptime guarantee on hosting plans, which ensures that your website traffic won’t be affected. To learn more about this hosting provider, read this DreamHost review.
B. How to Install WordPress on DreamHost?
Before the installation of WordPress, you need to check for the files that are already there in your website directory. If there are files, you can rename those with strings of numbers at the end. If there are no files in the directory, it won’t be touched by the installation. The all-new WordPress files will be installed along with the existing files.
Step 1: Log into your DreamHost’s custom-built panel and go to the option of ‘one-click install’. You will find a list of all the one-click install options on the site. From the drop-down, you need to choose ‘WordPress’.

Step 2: Choose the Domain that you want to install. The second textbox is if you want your installation in the subdirectory of the site. This is if you do not want your files stored in the primary directory. You can select the first directory from the drop-down and second from the text box type in the blog.

Step 3: Choose the database. Choose automatically to create a database for your site as it will create a completely new database for your website.
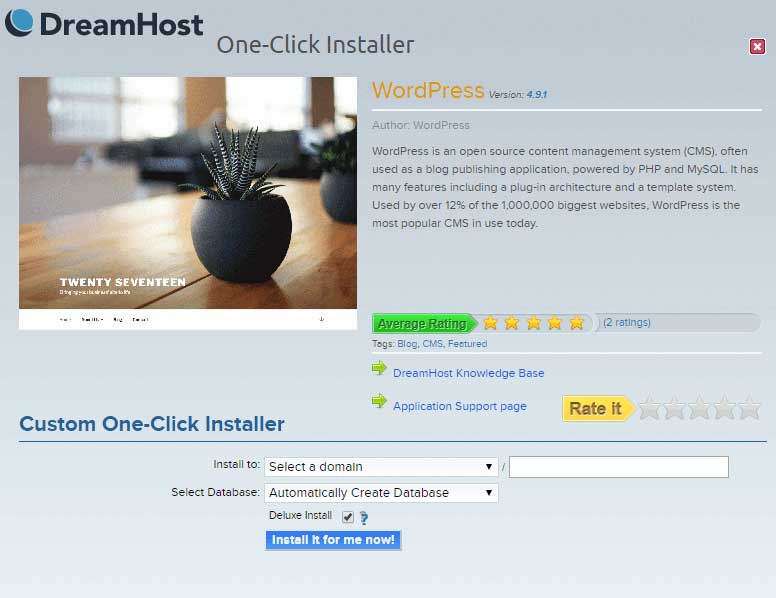
Step 4: Choose the ‘deluxe install option’. You need to check this box only if you like the extra features mentioned below. This may be a free addition to all your installs.
Step 5: Click on the ‘install for me’ option. Within ten to fifteen minutes, you’ll receive a primary email listed on your DreamHost account. The email will state further steps for installation.
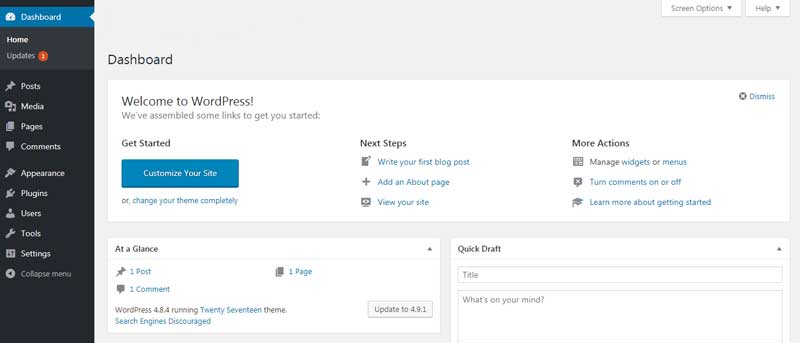
Now that you have installed WordPress on-site, you’ll receive all the primary login details in your email. When you see it finally running, you can go to the address example.com/wp-login.php for logging into your account.
C. How to Manually Install WordPress on DreamHost?
You need to create a new password and username that will enable you to create new databases. Once you find the MySQL database section, you can create a new user id.
It is important to create a password that will give you strong protection. To generate a powerful password, make use of a free tool such as LastPass. You can fill out the required fields accordingly. Fill in the privileges for a user account on the site.
Step 1: Log into the DreamHost Panel and go to the MySQL database section. Now, click on users with access column. Click on all the boxes under ‘What may users do to tables in these databases? Now, save all the changes and your databases are ready.
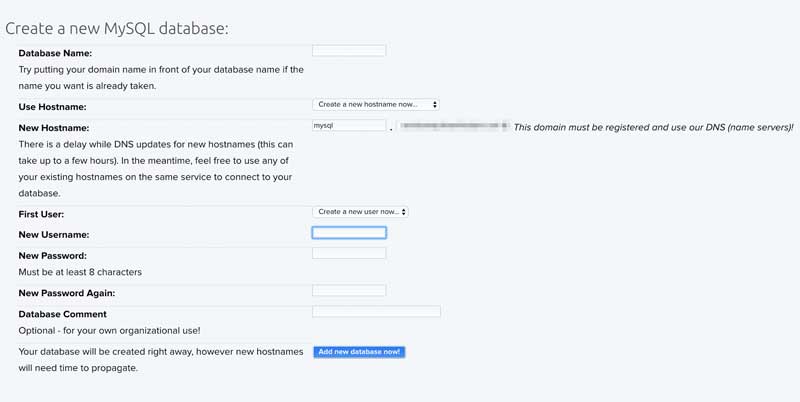
Step 2: Configure the ‘WordPress wp-config.php’ file. You need to tell WordPress where your database is and how you will access it. Navigate to your downloaded WordPress folder and unzip your file. You need to open it and follow the code below:

Step 3: Now, replace the placeholders in each defined function with specific database information.
- database_name_here (it includes the prefix and underscores outlined in the last step).
- username_here (again, includes the prefix and underscore).
- password_here.
- mysql.example.com (you’ll need to create a MySQL hostname in your panel and use that as the DB_HOST hostname).
Step 4: Now, upload all your WordPress files to your server. You can install WordPress into a subdirectory if you are using a clean server. Navigate to the local WordPress folder and copy all the files. Drag them to your root folder. When the files are uploaded and the database is setup, install the files. Once the files are updated, your database is set.
Step 5: After this, you can run the WordPress installation script to complete the process. Navigate to your domain name and replace the place holder domain. Now, you need to choose a language for your installation, the default being English.
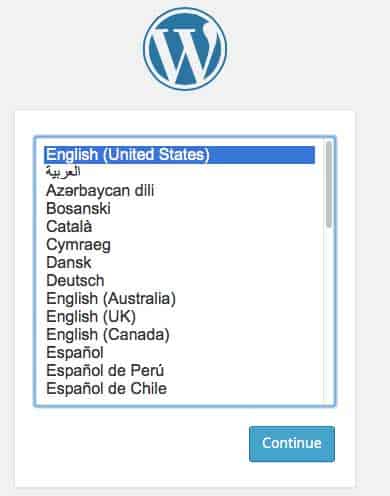
Continue and add WordPress username and email. Take care of security in this case. Uncheck the option of allowing the search engine to index the site box. Click ‘install WordPress’.
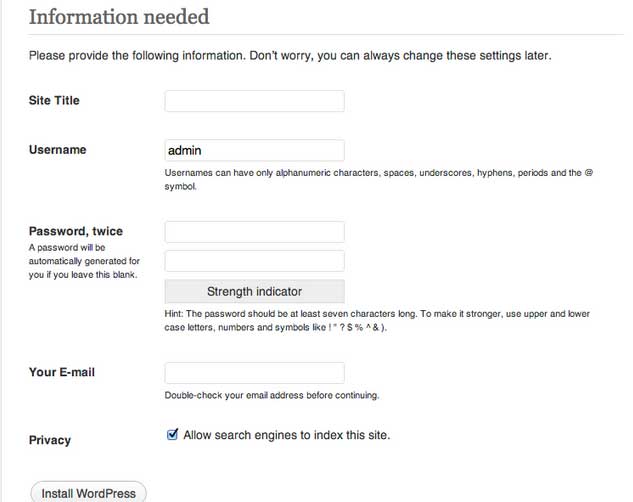
Choose to test your installation before you get started. Also, choose a suitable theme if you haven’t. You can also install some important plugins to customize the look of your WordPress website. Add-ons and plugins help to make your site scalable and also gives good exposure to your website. Check for all the functions and features when this is done.
Conclusion
DreamHost hosting powers many WordPress sites across the globe. With the one-click installation process of the site, your work will become much easier. Installing WordPress on DreamHost does not take your time and the effort is also less. With manual setup also, you will get full assistance for your site. It does give you the advantage of building a successful site.
Leave a Reply